

How to Hang Art Without Nails and Still Keep Your Deposit
For most framed art, adhesive picture-hanging strips are the simplest damage-free solution. Four large strips can hold up to 16 pounds when applied correctly, which covers the majority of framed prints and small canvases in a typical home. For anything lighter, adhesive hooks, mounting tape, or even a strip of putty will do the job. For anything heavier, or on a wall surface where adhesives struggle, lean the piece on a shelf or mantel, install a picture rail, or use a small press-in hook that leaves a pinhole instead of a nail hole.
The decision comes down to two questions: how much does the piece weigh, and what is the wall made of? Smooth painted drywall handles almost every method well. Textured walls, wallpaper, and tile need more caution and often a different approach entirely.
- Under 5 pounds: adhesive strips, hooks, or mounting putty
- 5 to 16 pounds: heavy-duty adhesive strips, doubled up for wide frames
- Over 16 pounds: picture rails, leaning displays, or a small-hole press-in hook
Test near the weight limit of any method, and add a second strip or hook rather than pushing one to its edge.
Key Takeaways
The safest way to hang art without nails is matching adhesive strength and wall surface to the exact weight of the piece, then verifying with a cure-time test before trusting it fully.
| Point | Details |
|---|---|
| Match method to weight | Use small strips or putty under 5 pounds, large strips up to 16 pounds, and rails or press-in hooks above that. |
| Prep the surface first | Clean with isopropyl alcohol and wait about seven days after fresh paint before applying adhesive. |
| Distribute the load | Use two hooks or strip pairs on wide or heavy frames instead of one central point. |
| Respect cure time | Wait at least one hour, longer for heavier pieces, before letting adhesive bear full weight. |
| Choose renter-ready products | Noble Abode’s adhesive hooks and pre-balanced metal wall art remove cleanly and skip guesswork on sizing. |
Table of Contents
- Damage-Free Ways to Hang Pictures Without Nails
- How Do You Apply Each No-Nail Hanging Method?
- Which Method Matches Your Artwork’s Weight and Wall?
- What’s the Right Order for Prep, Hang, and Removal?
- Why Trust This No-Nail Hanging Guide?
- How Much Weight Can Adhesive Strips and Hooks Really Hold?
- What Safety Steps Prevent Damage or Injury?
- What Tools Do You Need for Each Method?
- Does Humidity or Temperature Affect How Well Adhesives Stick?
- Should You Choose Temporary or Semi-Permanent Hanging?
- How Should You Hang Canvas, Framed Prints, Metal, and Glass?
- The Real Tradeoff Nobody Tells Renters About No-Nail Hanging
- Ready-to-Hang Options That Skip the Installation Guesswork
- Sources
- FAQ
Damage-Free Ways to Hang Pictures Without Nails
Every no-nail method fits a specific weight range and wall type. Scan the list below, then jump to the section that matches your art.
- Adhesive picture-hanging strips — best for framed art up to 16 pounds on smooth painted drywall; avoid textured walls and wallpaper.
- Adhesive hooks and mounting tape — good for lighter pieces (under 5 pounds) and works on tile or glass with the right formula.
- Leaning displays, shelves, and easels — no weight ceiling since the wall carries none of the load; ideal for oversized canvases.
- Picture rails and cable systems — a one-time install that then lets you rearrange heavy or rotating art without touching the wall again.
- Press-in, small-hole hooks — for pieces too heavy for adhesive, with a pinhole far smaller than a traditional nail hole.
- Washi tape and mounting putty — for posters, kids’ art, and anything under a pound or two.
- Magnetic hanging systems — limited to metal-backed pieces or walls with a steel stud track, a niche but genuinely damage-free option.
Pick the one that matches your artwork’s weight and your wall’s surface, then follow the application steps below.
How Do You Apply Each No-Nail Hanging Method?
Adhesive picture-hanging strips work best when the prep is treated as seriously as the hanging. Clean the wall and the frame’s back plate with isopropyl alcohol to strip away oils and dust that block adhesion. Size the strips to the frame’s weight and width, not just what’s in the drawer. Press each strip to the frame first and hold for 30 seconds, then press the frame to the wall for another 30 seconds. Manufacturer guidance calls for at least one hour of cure time before hanging anything, and heavier frames benefit from waiting closer to 24 hours. Remove strips by pulling straight down and slow, never outward or at an angle, which is what tears paint off the wall.
Adhesive hooks and mounting tape need a hook style that matches your frame’s hanger. A wire hanger wants a hook with a deep lip; a sawtooth hanger sits better on a flatter hook or a strip placed directly behind it. Wide frames should use two hooks spaced apart rather than one centered hook, since a single point of contact concentrates all the stress in one spot.
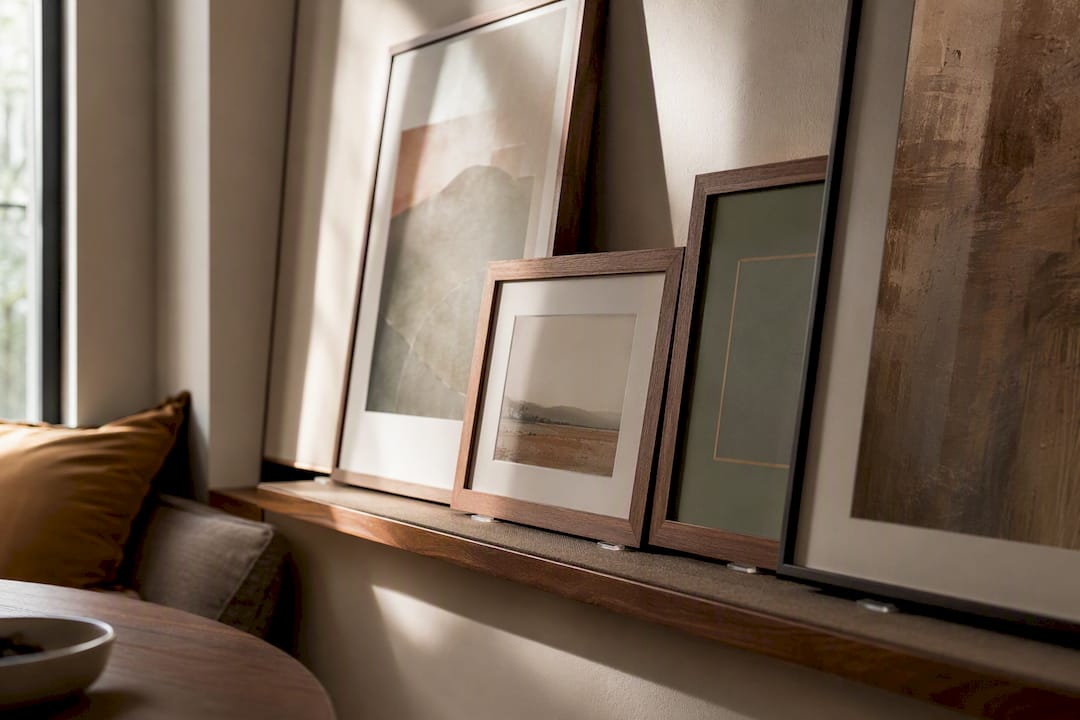
Leaning, shelves, and easels shift the entire weight question off the wall. A ledge shelf with a lip, museum wax under the frame’s base, or an anti-slip pad keeps art from sliding without a single hole. Layering two or three pieces on one shelf, largest in back, is often the safest way to display anything you’re not confident an adhesive can hold.
Picture rails and cable systems cost you one conversation with a landlord and a single set of small anchor points at the ceiling line, but after that, you can hang, rearrange, and swap heavy pieces indefinitely without touching the wall again. It’s the closest thing to a permanent solution that still counts as damage-free, since the wall itself is never drilled.
Press-in hooks trade a pinhole for serious weight capacity. Manufacturer-rated versions range from roughly 35 pounds up to 150 pounds depending on the model, though the practical ceiling depends heavily on your wall’s material and thickness. Space two hooks apart on wider frames instead of relying on one, the same distribution logic that applies to adhesive hooks.
Pro Tip: Keep a spare strip or hook of the same size on hand when you commit to adhesive. If one strip peels during the first hour, you’ll want an identical replacement, not a mismatched substitute that changes the weight rating.
Which Method Matches Your Artwork’s Weight and Wall?
Weight and surface together decide which method actually holds. A piece that would sit happily on textured plaster with putty might slide right off adhesive strips rated for the same number of pounds, because the strip’s bond depends on a smooth, even surface.
| Weight or Surface | Best Method |
|---|---|
| Under 1 pound (posters, kids’ art) | Washi tape or mounting putty |
| 1 to 5 pounds | Small adhesive strips or hooks |
| 5 to 16 pounds | Large adhesive strips, doubled for wide frames |
| Over 16 pounds | Picture rail, leaning display, or press-in hook |
| Smooth painted drywall | Any adhesive method |
| Textured walls or wallpaper | Putty, press-in hooks, or leaning; avoid most adhesives |
| Tile or glass | Specialty adhesive hooks rated for smooth nonporous surfaces |
| Brick or concrete | Press-in masonry hooks or leaning displays |
Before committing, weigh the piece, clean a small test patch, and follow the manufacturer’s stated wait time. If the weight sits near a method’s upper limit, add a second strip or hook rather than trusting one to carry the load alone.
What’s the Right Order for Prep, Hang, and Removal?
- Weigh the art. A bathroom scale under the frame gives you an exact number instead of a guess.
- Remove any protruding screws or hardware on the frame’s back that could puncture an adhesive strip.
- Clean both the wall and the frame with isopropyl alcohol. If the wall was painted recently, wait roughly seven days before applying adhesive.
- Press strips to the frame for 30 seconds, then press the frame to the wall for another 30 seconds while checking it’s level.
- Wait at least one hour before letting the piece bear its own weight; heavier frames do better with several hours or overnight.
- Check monthly for slipping, especially in rooms with big temperature swings.
- Remove by pulling adhesive straight down, slowly. For press-in hooks, back them out per the manufacturer’s instructions and fill the pinhole with a dab of spackle.
Skipping the cleaning step or the wait time is the most common reason adhesives fail, not a defect in the product itself.
Why Trust This No-Nail Hanging Guide?
- Every method above follows manufacturer-published weight limits and application steps, not guesswork.
- Noble Abode designs adhesive-friendly wall art and hooks specifically for renters, informed by posts like Art for Narrow Hallways.
- Products are sized and backed to apply and remove cleanly, matching the exact methods detailed in this guide.
How Much Weight Can Adhesive Strips and Hooks Really Hold?
Weight capacity depends on the number of strips or hooks used, not just their individual rating. Four large adhesive strips can support up to 16 pounds combined, but that figure assumes correct spacing and full cure time, not a rushed application.
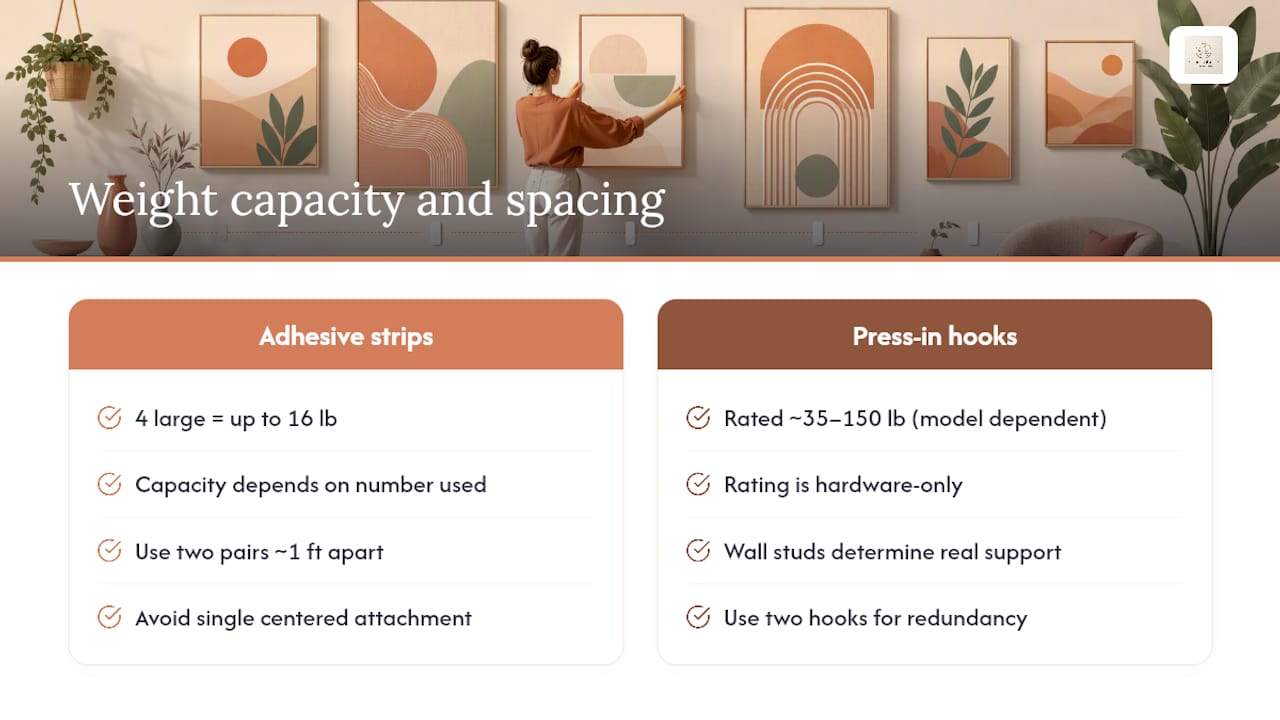
Distribute the load rather than concentrating it. A single center hook on a two-foot-wide frame puts all the stress on one point, and that point is exactly where adhesive tends to peel first. Two hooks or two strip pairs placed a foot apart share the weight and resist the twisting motion that causes most failures. For frames with a wire hanger spanning the back, a strip placed at each end of the wire does more work than one centered strip, since the wire itself already spreads tension across the frame.
Press-in hooks scale differently. Manufacturer-rated capacities run from around 35 pounds on lighter models up to 150 pounds on heavy-duty versions, but that number reflects the hook’s hardware, not necessarily what your particular wall can support. Drywall without a stud behind it will give out before a 150-pound-rated hook does. When a piece sits near any method’s stated limit, add redundancy: a second hook, a second strip pair, or a shift to leaning instead of pushing one hanging point past what it was built for.
What Safety Steps Prevent Damage or Injury?
Test before you trust. Once a strip or hook has cured for the recommended time, apply gentle upward pressure before letting go completely. If anything shifts, add a second point of support immediately rather than hoping it holds overnight.
Weight limits exist for the hardware, not for your wall. A strip rated for 16 pounds assumes a smooth, structurally sound surface underneath. Popcorn ceilings, crumbling plaster, or drywall with hidden water damage will fail well below that number. Inspect the spot you’re using before committing anything heavy to it.
Placement matters as much as hardware. Keep large or heavy pieces away from doorways, stairwells, and headboards, since a fall in those spots is a safety issue, not just a decor one. Bathroom and kitchen installs face extra humidity, so give adhesive strips a longer cure window in those rooms and check them more often.
Check hanging art monthly, especially in the first few weeks after installation. A slight tilt or a corner pulling away from the wall is an early warning, not something to ignore until it drops. Re-press or replace the strip at the first sign of movement.
Finally, match the caution to the risk. A pinhole from a press-in hook needs the same wait-and-test discipline as an adhesive strip if the art is heavy enough to matter. Skipping the verification step because a method “seems sturdier” is how avoidable falls happen.
What Tools Do You Need for Each Method?
Adhesive strips require just three things: isopropyl alcohol and a cloth for cleaning, the strips themselves sized to the frame’s weight, and a level to keep the piece straight while the bond sets. No drill, no stud finder, no hammer.
Adhesive hooks need the same cleaning supplies plus a hook rated for your hanger type. Mounting tape works similarly but suits flatter, lighter items like small canvases without a wire hanger.
Leaning displays need almost nothing beyond a shelf, ledge, or mantel and optionally a dab of museum wax or an anti-slip pad to keep the piece from sliding when a door slams nearby.
Picture rails and cable systems are the one method with real installation involved: a rail track, mounting hardware for the rail itself, cable hooks, and a small anchor point at the ceiling line. It’s a bigger upfront project but pays off in flexibility later.
Press-in hooks need only the hook and, ideally, a small piece of spackle set aside for when you eventually remove it. A putty knife helps smooth the repair once the hook comes out.
Across every method, a soft cloth, a bathroom scale for weighing the art beforehand, and painter’s tape for marking placement before committing to a final spot will save you from having to redo the job.
Does Humidity or Temperature Affect How Well Adhesives Stick?
Yes, and it’s one of the most overlooked reasons adhesive strips fail. Adhesive bonds cure through a chemical process that slows down in cold rooms and speeds up in warm ones, so a strip applied in a 60 degree Fahrenheit space needs more time to reach full strength than the same strip in a 75 degree room.
Humidity matters just as much, especially in bathrooms and kitchens. High moisture in the air can weaken the bond before it fully sets, which is why heavier or longer cure windows make sense in those rooms specifically. If you’re hanging art in a bathroom, give the adhesive extra time before loading any weight onto it, and check the piece more frequently in the following weeks.
Freshly painted walls compound the problem. Paint continues releasing solvents and moisture as it cures, and adhesive applied too soon bonds to a surface that’s still chemically active. That’s why waiting roughly seven days after painting before applying any adhesive strip or hook is standard advice, not an overcautious suggestion.
Seasonal swings matter too. A strip that held fine through a mild spring might loosen during a humid summer or a dry, overheated winter if your home’s climate control fluctuates. If a piece hangs somewhere with big temperature or humidity shifts, like near a window or above a radiator, check it more often than you would in a stable interior room.
Should You Choose Temporary or Semi-Permanent Hanging?
Temporary methods like adhesive strips, putty, and washi tape are built for change. They remove cleanly, leave no lasting mark, and suit anyone who redecorates often or doesn’t know how long they’ll be in a space. The tradeoff is a firmer weight ceiling and more sensitivity to surface condition.
Semi-permanent options like picture rails and cable systems ask for more upfront effort, a rail installed once, generally with landlord sign-off, but reward you with the ability to rearrange heavy or rotating art indefinitely afterward. Once the rail is up, moving a piece takes seconds and touches the wall exactly zero times.
Press-in hooks sit in between. The hole they leave is small enough to patch invisibly, but it’s still a hole, which makes them a step toward permanence that most renters reserve for pieces too heavy for anything else.
The right call depends on how long you’re staying and how often your walls change. Someone renewing a lease year after year might find a rail system pays for itself in flexibility. Someone in a short-term rental almost always does better sticking with adhesive strips and putty, since full reversibility matters more than convenience.
How Should You Hang Canvas, Framed Prints, Metal, and Glass?
Canvas art is usually light for its size, since the frame is often just thin wood stretcher bars. Most canvases under 24 by 36 inches sit comfortably within adhesive strip weight limits, but check for a sawtooth hanger or wire on the back before assuming standard hardware applies.
Framed prints vary widely depending on the glass and matting inside. A framed print with glass weighs meaningfully more than the same print unframed, so weigh the finished piece, not just the paper, before picking a method.
Metal wall art, like dimensional line-drawing pieces, tends to be lighter than it looks since most use thin gauge metal, but sharp edges or cutout designs can concentrate weight unevenly across a small mounting point. A ready-to-hang metal set with pre-installed hanging hardware simplifies this, since the weight distribution is already engineered into the piece.
Glass-framed pieces need extra caution regardless of weight, since a failed adhesive drops both the frame and a sharp surface. Use redundant hooks or strips on anything with glass, even if the piece technically falls within a single strip’s rating.
The Real Tradeoff Nobody Tells Renters About No-Nail Hanging
Most guides treat “no nails” as a single category, as if adhesive strips, leaning, and rails are interchangeable. They aren’t, and the gap between them is where most renters lose their security deposit anyway. The real skill isn’t picking a no-nail method. It’s matching the method to the actual weight of the piece and the actual condition of the wall, and being honest with yourself about both.
Where conventional advice falls short is the assumption that adhesive can handle everything if you just buy a bigger strip. It can’t. A textured wall or a wall painted within the last week will defeat even a strip rated for 16 pounds, because the failure point isn’t the adhesive, it’s the surface underneath it. Renters who skip the alcohol wipe and the cure time are the ones who end up with a scraped patch of paint and a broken frame on the floor.
If you take one thing from this guide, prioritize the wall test over the weight rating. A clean, smooth, fully cured surface will outperform a premium adhesive on a bad wall every time.
— Stephane
Ready-to-Hang Options That Skip the Installation Guesswork
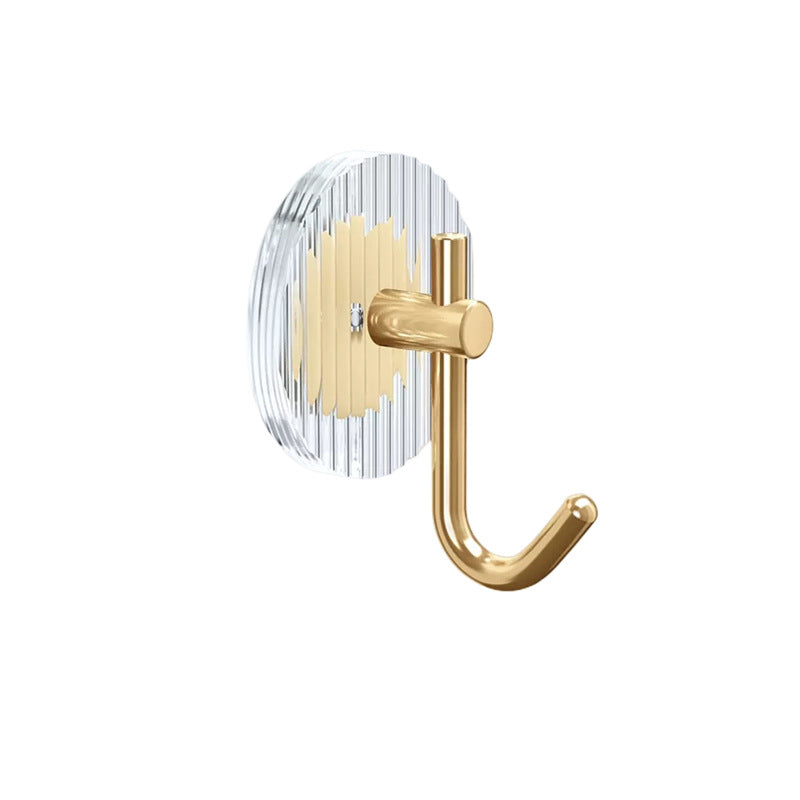
Buying the right adhesive is only half the job; pairing it with wall art collections sized for easy hanging removes most of the guesswork. Pairing it with art that’s already sized and balanced for adhesive hanging removes most of the guesswork. Noble Abode’s Luxury Transparent Adhesive Hook for Bathroom Walls is built for discreet, damage-minimizing hangs in high-humidity rooms where standard hooks struggle, and it stays nearly invisible against tile or paint.
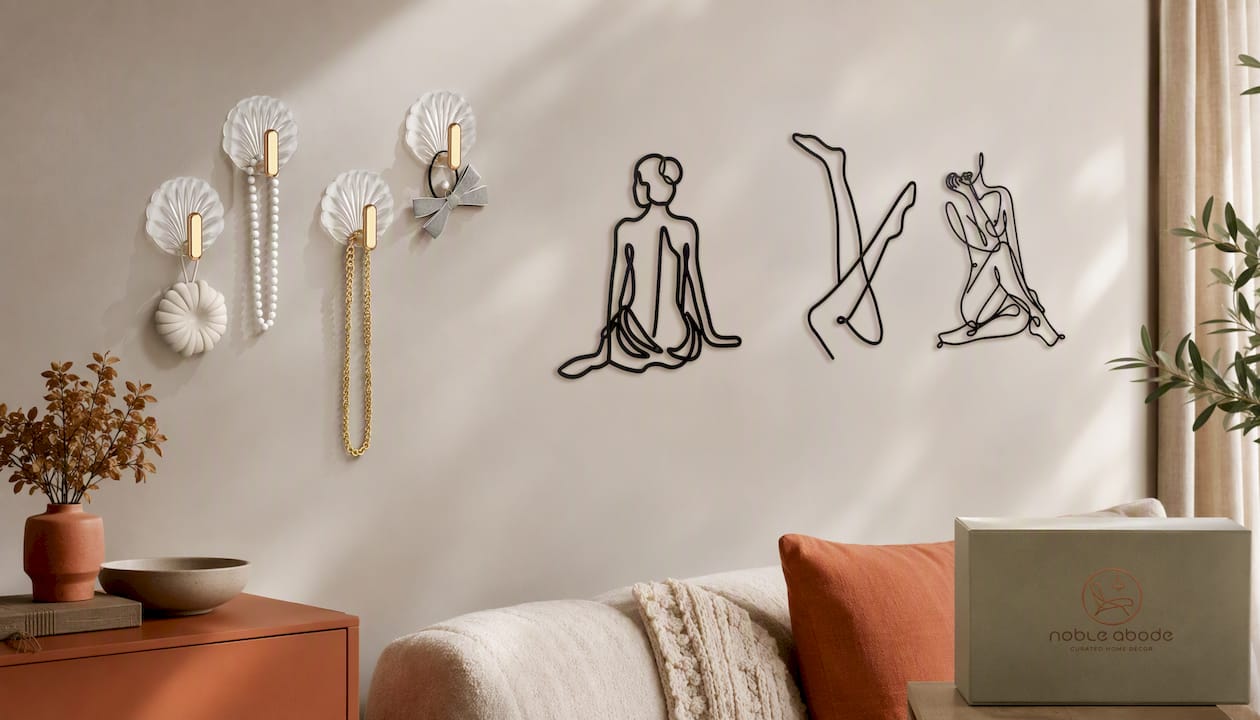
For heavier or decorative pieces, the Luxury Acrylic Adhesive Hooks for Bathroom & Kitchen offer a stronger hold with a finished look that doesn’t read as hardware-store generic. And if you’d rather skip individual frame decisions entirely, the 3 Pcs Metal Wall Art Decor Minimalist Abstract Woman set comes pre-balanced for adhesive hanging straight out of the box. All three remove cleanly when you move out, no patching, no drilling, no deposit deductions. Browse the transparent adhesive hook page to check sizing against your current wall art today.
Sources
- How much weight can Command strips hold? — Hook & Loop blog
- How to Hang a Picture Without Nails — Command™ (3M UK)
- How to Hang Pictures Without Nails — Family Handyman
FAQ
How Do You Hang Art Without Nails?
Use adhesive picture-hanging strips for most framed art up to 16 pounds, adhesive hooks or putty for lighter pieces, and leaning displays or picture rails for anything heavier or on a surface adhesive can’t grip.
Are Adhesive Strips Better Than Nails?
For renters, yes, since they remove cleanly and leave no wall damage when applied and removed correctly, though they carry a firmer weight ceiling than a nail and stud combination.
What Can You Use Instead of Nails on a Wall?
Adhesive strips, adhesive hooks, mounting putty, washi tape, picture rails, and small press-in hooks all work as nail-free alternatives, each suited to a different weight range and wall type.
How Can You Hang Heavy Pictures Without Damaging the Wall?
Lean heavier pieces on a shelf or mantel, install a picture rail, or use a press-in hook rated for the weight, since standard adhesive strips top out around 16 pounds even when doubled up.
Do Adhesive Hooks Work on Textured Walls or Wallpaper?
Generally not well. Most adhesives need a smooth, even surface to bond properly, so textured walls and delicate wallpaper call for putty, press-in hooks, or leaning instead.