

Art for Narrow Hallways: 12 Ideas to Make It Feel Wider
For most narrow hallways, a single vertical statement piece is the highest-impact choice. It draws the eye forward, adds perceived height, and requires no complex arrangement. If your hallway runs long, a slim vertical gallery in one consistent frame finish works equally well. For renters or anyone who wants flexibility, a picture ledge with a runner below is the most practical option.
Start here:
- Measure your hallway width before buying anything.
- Choose vertical orientation for any artwork in corridors under 36 inches wide.
- Select renter-safe hanging hardware (3M Command strips, picture ledges) if you cannot drill.
Design examples confirm that a bold piece at the terminal wall creates depth and a clear focal point, making even the shortest corridor feel intentional.
Key Takeaways
Vertical orientation, thin frames, and a single consistent frame finish are the three rules that matter most for art in a narrow hallway.
| Point | Details |
|---|---|
| Vertical orientation first | Choose vertical artwork in any corridor under 36 inches wide to add perceived height. |
| — | In a 30-inch hallway, that means artwork 15–22 inches wide. |
| Thin frames under 1 inch deep | Shallow profiles reduce collision risk and visual bulk in tight corridors. |
| Layer your lighting | Ambient ceiling fixtures plus wall-level sconces or picture lights make art readable. |
| Noble Abode curated picks | Vertical prints, canvas sets, and shelf accents mapped to each hallway strategy. |
Table of Contents
- Which art formats work best in narrow hallways?
- Exact size and orientation rules for hallway art
- Single statement piece vs. gallery wall: which fits your hallway?
- Materials, frames, and finishes that hold up in high-traffic corridors
- How to hang art in a narrow hallway, step by step
- Lighting and mirrors that make hallway art visible
- Concrete styling layouts you can copy this weekend
- Typical costs and timelines for hallway art projects
- An editorial perspective on choosing art for tight spaces
- Noble Abode picks for your hallway strategy
- Sources
- FAQ
Which art formats work best in narrow hallways?
Not every format suits a tight corridor. Viewing distance is short, traffic is constant, and wall width limits your options. These five formats consistently perform well.
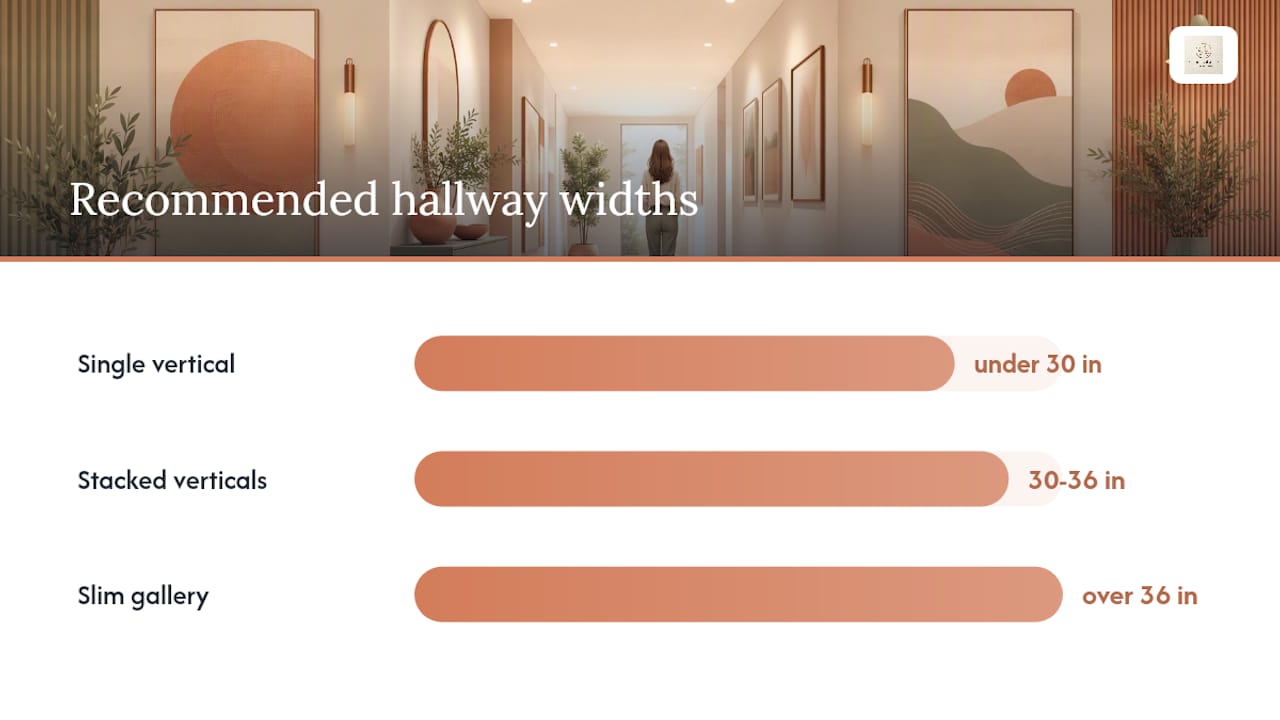
- Single vertical print or canvas. Best for hallways under 30 inches wide. One tall piece reads clearly at close range and adds height.
- Stacked verticals. Two or three prints arranged in a column. Draws the eye upward, works in corridors 30–36 inches wide.
- Slim gallery in one frame finish. Three to five pieces in matching thin frames, spaced consistently. Suits longer straight hallways over 36 inches wide.
- Picture ledge. A shallow floating shelf holding leaned prints. Renter-friendly, easy to rearrange, low wall damage.
- Mural or wallpaper panel. High visual impact, works as a terminal focal point. Best for homeowners willing to commit.
Art in hallways must be legible at short viewing distance, which is why larger, simpler works or tightly spaced galleries read better than dense, small-frame arrangements.
| Format | Visual Impact | Traffic Durability | Best For |
|---|---|---|---|
| Single vertical | High | High (one anchor point) | Corridors under 30" wide |
| Stacked verticals | Medium-high | Medium | 30–36" corridors |
| Slim gallery | High | Medium | Long straight hallways |
| Picture ledge | Medium | High (no wall holes) | Renters, flexible layouts |
| Mural/wallpaper | Very high | High (surface-level) | Homeowners, terminal walls |
Exact size and orientation rules for hallway art
Artwork that is too small disappears. Too large, and it crowds an already tight space. These rules give you a repeatable starting point.
In a 30-inch-wide hallway, that means a piece roughly 15 to 22 inches wide.
Vertical orientation is the default for narrow corridors. It adds perceived ceiling height and keeps the piece from visually narrowing the path. Horizontal pieces work only in hallways wider than 36 inches, and only when the piece is tall enough to anchor the wall.
Centerline height: hang artwork so the center sits 57–60 inches from the floor. In very tight corridors where people walk close to the wall, drop to 56 inches so the piece stays in comfortable sightline without feeling overhead.
Pro Tip: Tape a paper template of your intended artwork to the wall before buying. Live with it for a day. Narrow hallways amplify sizing mistakes more than any other room.
Vertical stacking draws eyes upward rather than stretching frames across limited horizontal width, a consistent recommendation from small-space gallery guides.
Single statement piece vs. gallery wall: which fits your hallway?
The decision comes down to hallway length and how much visual activity you want.
Choose a single statement piece when:
- The hallway is short (under 8 feet long).
- You want calm, minimal decor.
- The wall width is under 30 inches.
- You are a renter and want minimal holes.
Choose a slim gallery when:
- The corridor runs 10 feet or longer.
- You have consistent lighting along the full length.
- You can commit to a single frame finish and consistent spacing.
Gallery spacing rules:
- Keep gaps between frames at 2 to 3 inches for a tight, curated look.
- Use a single frame finish (all black, all natural wood, all white) to unify the arrangement.
- Limit the gallery to one column (vertical stack) or one horizontal row, not both.
- Cap the number of pieces at five in most hallways. More than five creates visual noise at close range.
- Use a paper template or painter’s tape to map the layout before drilling.
For variable-width corridors or renters, picture ledges offer a middle path: lean three prints in matching frames, vary heights slightly, and rearrange without touching the wall.
Materials, frames, and finishes that hold up in high-traffic corridors
Narrow hallways take more physical contact than any other room. Frame choice matters for both aesthetics and durability.
- Thin metal frames (3/4" to 1" profile). Low profile, durable, and visually recede into the wall. Best for corridors under 36 inches wide where frame depth creates collision risk.
- Flush wood frames. Warm, minimal. Choose profiles under 1 inch deep for tight corridors.
- Acrylic/plexiglass glazing. Lighter than glass, shatter-resistant, and safer in high-traffic areas. A practical upgrade over standard glass for any hallway under 30 inches wide.
- Matte paper or cotton rag prints. Matte finishes reduce glare under variable hallway lighting and improve legibility as you walk past.
- Avoid deep shadow-box frames in corridors under 36 inches. The added depth increases collision risk and makes the wall feel closer.
Thin frame profiles and shallow frame depths are specifically recommended for hallways under 36 inches wide, reducing both the visual bulk and the physical hazard.
Lightweight metal wall art is a strong option here: low-profile, durable, and easy to hang flush.
How to hang art in a narrow hallway, step by step
A clean hang in a tight corridor requires precision. There is no room to hide an off-center piece.
- Measure the wall section where the art will hang. Note width, height from floor to ceiling, and any obstructions (light switches, outlets).
- Mark the centerline of the wall section at 57–60 inches from the floor. Use a pencil.
- Create a paper template of the artwork (trace the frame on kraft paper, cut it out, mark the hanging hardware location). Tape it to the wall and step back.
- Check level. Use a bubble level or a free smartphone level app before marking the final nail or strip position.
- Install hardware. For permanent installs: use a wall anchor rated for the frame weight. For renters: 3M Command Picture Hanging Strips rated to the frame weight, applied to a clean, dry wall surface.
- Hang and re-check level after placing the frame.
Tool list: tape measure, pencil, bubble level, kraft paper, painter’s tape, 3M Command strips or wall anchors, drill (if permitted).
Pro Tip: For renter-safe hanging, 3M Command strips work on most painted drywall surfaces. Always check the weight rating on the package against your frame weight before purchasing.
Clearance note: keep at least 36 inches of clear walking width in any hallway used as an egress path. Art and frames must not protrude into that clearance.
Lighting and mirrors that make hallway art visible
Low light is the most common reason hallway art looks flat. Layered lighting and a lengthwise runner are two of the highest-impact upgrades for narrow corridors.
- Ambient layer. Recessed or flush-mount ceiling fixtures spaced every 8–10 feet. This is the baseline; without it, everything else is a patch.
- Wall-level fixtures. Slim sconces or low-profile picture lights mounted at eye level draw attention to the art and add warmth. Choose fixtures that project no more than 3–4 inches from the wall in corridors under 36 inches wide.
- Accent/directional LEDs. Small adjustable recessed spots or plug-in picture lights aimed at individual pieces. Useful for highlighting a terminal focal piece.
- Mirror placement. A vertical mirror on a side wall bounces light and widens perceived space. Avoid placing mirrors directly opposite the entrance or opposite another mirror, which creates distracting repeated reflections.
Keep sconces and picture lights flush or semi-flush. A fixture that juts 5 inches from the wall in a 28-inch corridor is a hazard, not a feature.
Concrete styling layouts you can copy this weekend
Short on time? These five arrangements map directly to common corridor types.
- Short entry (under 6 feet). Single vertical botanical or abstract print, 18"×24". Slim vertical mirror on the adjacent wall. Narrow runner below. Clean, fast, high impact.
- Long straight hallway (10+ feet). Three to five prints in matching black thin frames, hung in a single horizontal row at eye level. Flush sconces between frames. Lengthwise striped runner.
- Renter-friendly setup. Picture ledge at 56 inches from floor. Three leaned prints in white frames, varied heights. Small sculptural accent at one end of the ledge.
- Terminal focal wall. One oversized vertical print (24"×36" or larger) centered on the far wall. Nothing else on the side walls. This is the single highest-impact move for a long corridor.
- Mixed-width corridor. Picture ledge on the wider section, single vertical print on the narrower section. Keeps the arrangement flexible without crowding.
Pro Tip: A runner that runs nearly the full corridor length, leaving 4–6 inches of floor visible on each side, visually lengthens the space and anchors the art above it.
Coordinated prints, a well-chosen runner, and updated lighting are consistently the three lowest-cost, highest-return moves in a narrow hallway makeover.
For small-space decorating ideas that extend beyond the hallway, Noble Abode’s blog covers compact room strategies in detail.
Typical costs and timelines for hallway art projects
Prioritization: prints plus a picture ledge plus 3M strips deliver the fastest visible change for the lowest cost. Add a sconce second. Custom framing and murals are last-mile upgrades once the layout is confirmed.
Small, coordinated investments in prints, a runner, and lighting consistently outperform single expensive statement pieces in narrow corridors.
An editorial perspective on choosing art for tight spaces
The most common mistake in narrow hallway decor is treating the space as an afterthought and filling it with whatever is left over from other rooms. Scale and sightline rules for hallways differ fundamentally from living rooms. You are decorating for movement, not for seated contemplation.
The practical checklist that holds up across most projects: measure first, commit to vertical orientation, pick one frame finish and stay with it, and keep frame depth under one inch in any corridor narrower than 36 inches. Renter constraints are not a limitation; picture ledges and Command strips produce arrangements that are easier to update than drilled galleries.
One overlooked point: the terminal wall is the most valuable real estate in any hallway. A single well-scaled piece there does more work than five pieces scattered along the sides. Treat it as the anchor and let everything else support it.
Noble Abode picks for your hallway strategy
Noble Abode curates pieces sized and finished for exactly the three hallway strategies covered above.

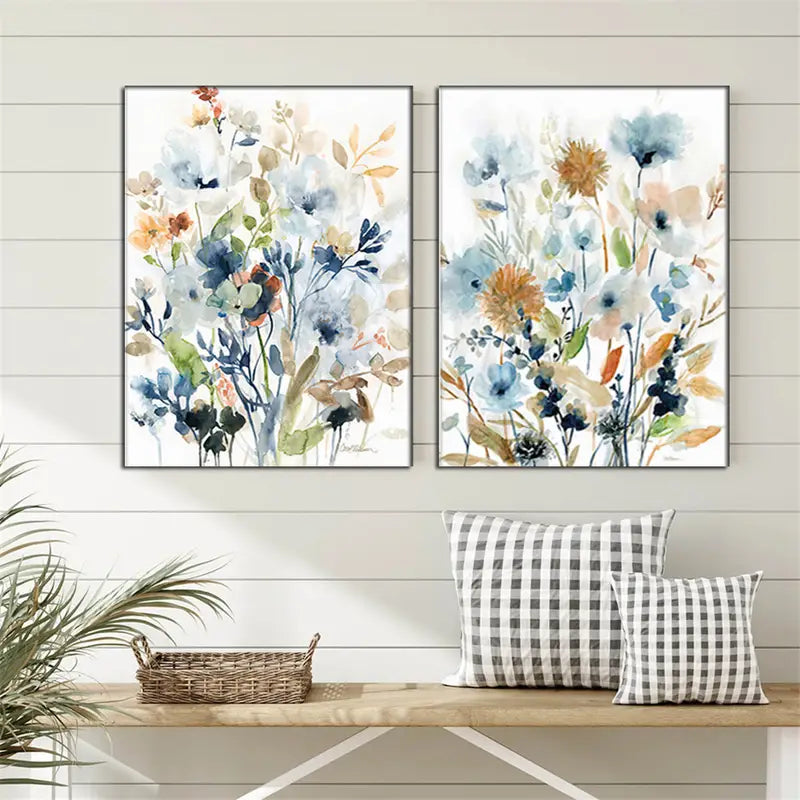
For the single vertical statement approach, the Abstract Art Figure Decoration is a vertical piece scaled for entry hallways and short corridors. For a slim gallery, the 2pcs Floral Leaf Canvas Art Posters are designed for stacked or side-by-side arrangements in a consistent finish. For the picture ledge setup, the Magnetic Levitation Flower Ornament adds a lightweight sculptural accent that sits on a narrow shelf without bulk.
All pieces are lightweight, easy to maintain, and built for high-traffic areas. Browse the full selection at Noble Abode to find the right fit for your corridor width and hanging constraints.
Sources
- 15 Hallway Decor Ideas That Make Even the Narrowest Spaces Feel Chic
- 30 Narrow Hallway Ideas for Maximum Style and Function
- Gallery Walls for Small Spaces — GalleryPlanner
- Entryway and hallway wall art ideas
- How to Decorate a Narrow Hallway Without Crowding It - Home Decor Write
- Hallway Decor Ideas for Narrow Spaces - Worthing Court
FAQ
How do you decorate a very narrow hallway?
Focus on one vertical artwork or a slim gallery in matching frames, keep frame depth under one inch, and add a lengthwise runner. Layered lighting (ceiling fixture plus a wall sconce) makes the biggest difference in corridors under 30 inches wide.
What kind of art looks good in a hallway?
Larger, simpler vertical pieces or tightly spaced galleries in a single frame finish read best. Matte finishes reduce glare under variable lighting, and acrylic glazing is safer than glass in high-traffic corridors.
What are the trends for decorating hallways in 2026?
Slim metal frames, matte botanical and abstract prints, and picture ledges with mixed sculptural accents are the most common choices. Renter-friendly hanging solutions (Command strips, leaned prints) are increasingly standard.
What should you put on a wall in a small hallway?
A vertical mirror on the adjacent side wall adds light and perceived width without crowding the path.